Here's A Few Facts About Glazing Repair. Glazing Repair


Glazing Repair Tips
Keep windows and doors intact as part of your building maintenance. Glazing repairs are a big responsibility for any glass company. They must operate at heights with huge panes and follow strict protocol.
Moisture or water in double glazed windows is often due to the seal that holds the two panes down. This can be fixed with the process of reglazing.
Chips or cracks in the panes
A cracked or chipped window pane isn't just ugly, but it could also leave your home vulnerable to elements. While it's impossible to prevent cracks from developing however, you can take steps to slow down their progression and extend the life of your windows.
One of the easiest methods to stop the crack from getting more severe is to apply a strong-hold tape to keep it in the right place. Masking tape or packing tape can work for small cracks, such as stress cracks caused by cold temperatures causing the glass to expand and contract. For more severe cracks, it is possible to increase the amount of tape. Window Glazier and Glazing ealing repairmywindowsanddoors should extend beyond the edges of the window on both sides.
If you'd like an easier solution, nail polish could also do the job. Clear nail polish is a great adhesive that can help keep the crack from expanding and closes the gap to stop moisture from escaping or entering your home. However, this type repair isn't going to last long and may need to be applied regularly.
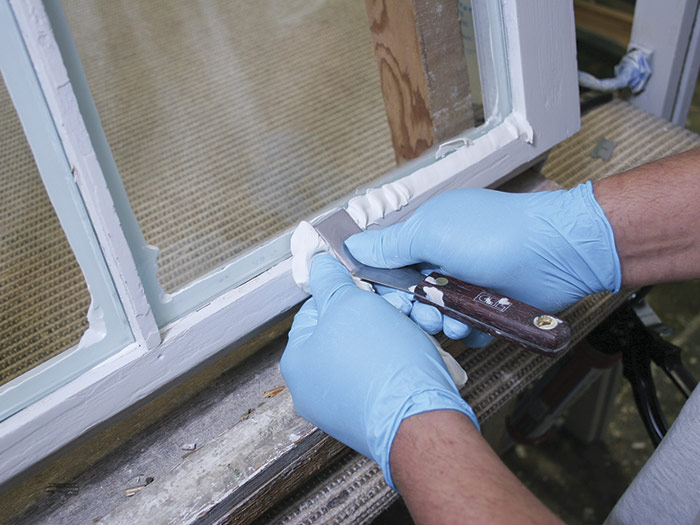
Epoxy is a more durable option for fixing damaged window glass. Begin by cleaning the damaged area using soap and water to remove any debris or shattered pieces of glass. Prepare the area to work in by putting on safety goggles and gloves that are protective. Take off the sash from your window, if required (newer casement windows come with release locks that make this task simpler).
Mix equal parts of hardener and epoxy in a dish made of plastic or in an area with good ventilation. Then apply the mixture of epoxy onto the glass with a putty knife. Be careful not to apply too much pressure. Let the epoxy mixture sit for 10 minutes before removing any excess with a razor blade, or a clean rag soaked in Acetone.
If you do a good job of fixing the window and it isn't frequently bumped, it could last for a long time before having to be replaced. If however, you observe signs of wear and tear, or the crack is growing wider than it was initially it is recommended to replace your glass windows instead.
Leaking Windows
It is essential to act promptly if you've got leaky windows. Moisture seeping through windows can lead to wood rot, mould growth and other issues that could damage your home or affect your health. However, there are methods to fix leaky windows that can keep your home warm and safe.
Many window leaks are the result of aging or worn sealant. When the glazing putty used to keep the window in place dry, it can leave gaps that let cold air or water into your home. This issue can be addressed by resealing your sealant with new caulk. You should use waterproof caulk so that it is effective in battling water and preventing leaks.
Poor installation is a common cause of leaky windows. This could include flashing that's vulnerable to water or nails that do not resist corrosion. In these instances it might be necessary to replace the window entirely.
Leaking windows are also a sign that it's time to upgrade to high-efficiency vinyl. They are more energy efficient than older windows, and will lower your cooling and heating costs.
When a window leaks, it can be difficult to determine the source. Examine the walls around your window for water spots. These stains are usually an indication that moisture is making its way into the wall cavities, which could lead to issues with furniture and flooring.
Window professionals can help you determine the source of a leak. They'll be able to examine the entire structure of the window as well as the wall to identify the issue. This is a complicated procedure, but it's the most thorough approach. A professional can take away any damaged wood from the frame of the window and the wall surrounding it, then replace the material with new materials in order to avoid any future leaks. They can also perform the full replacement of the frame, which is a more complicated solution that includes taking out the old window, and then installing an entirely new one from the starting point.
Missing Sealant Beads
A common issue is the absence of sealant beads at joints and corners. These missing beads create avenues for water to enter the glass and in the glazing pocket. These gaps can be filled by using silicone caulk in a gun-grade application. Make sure you have enough sealant and the appropriate caulking tool to finish the job. Be sure to use denatured alcohol to clean the area and get rid of any debris or residue that might hinder the new sealant adhering to the substrate. To test the compatibility and adhesion, mock-ups should be made with the sealant.
Put the sealant tube into the caulking tool. When you squeeze the trigger, sealant will begin flowing out. If necessary cut the tip of the application tube to make it longer. To get a feel for the sealant, lay a bead onto scrap wood. After laying a bead and gently drag a painter's edge tool or your finger (moisten finger with soapy water) over the bead to smooth it. Avoid dragging the tool in more than one way over the silicone bead.
Low Energy Efficiency
The use of high-efficiency glazing reduces the loss of heat in homes and can help reduce energy costs. It also helps to block out outside noises, resulting in a more peaceful environment.
Keep your windows free of paint stains so that they're functioning. This can be accomplished with the help of solvents or paint thinners. Since certain chemicals emit strong fumes, it's important to ensure that the area is ventilated. Test the substance first on a small amount of glass to determine if it's safe for use.
Cover all surfaces near the window panes with dropcloths or plastic sheets. Doing this will protect the areas from paint splatters and other damage that may occur during the removal process. The next step is to soak the surface with the cleaner. This will soften the stain and make it easier to remove. You can employ a plastic scraper, or a putty knife, but do not apply too much force since this could scratch the window's surface.
It is essential to speak with the conservation officer of your local council before making any modifications to your windows when you live in an area designated as a conservation area or a structure that is listed. They can provide suggestions on non-intrusive ways to increase the energy efficiency of a property.